Bidding
MANAGE YOUR JELLYFISH LIGHTING BIDS
Bid Calculator for the Best Permanent Outdoor LED Lights
To help you quickly and conveniently bid outdoor led eave light jobs and close sales, we have created a spreadsheet calculator for you to use.
-
Outdoor Lighting Job Bid & Sales Tool: A spreadsheet calculator designed for quick job-cost calculation, profit calculation, bidding and sales closing.

-
Input Requirements:
- Linear feet estimate of the local eave light job.
- Anticipated home runs.
- Anticipated jumps.
- Linear feet estimate of the local eave light job.
-
Automatic Calculations:
- JellyFish Lighting Material cost.
- Shipping cost.
- JellyFish Lighting Material cost.
-
Manual Inclusions:
- Piece-rate labor cost for permanent Christmas Light Installation.
- Materials: crimps, screws, paint, cable, wi-fi extender
-
Permanent Eave Light Bid & Profit Calculation Options:

- Markup-based calculation.
- Margin-based calculation.
- Price per linear foot calculation.
Latest update: 2025.11.5
It is important to have a plan in place to manage your bids. If you wanted to use the same system we use, it is called: SKEDIT
At a minimum, you want the most basic information available to each person who needs to know (Sales Team, Install Team, Accounting, Warehouse, Etc.). One way to do this using a management system like SKEDIT. Another way is to manage customers in Google Docs by creating a folder for each customer that contains all of the customers sales information including a copy of the bid, photos, and sales agreement.
- Create a Google Docs folder to manage your customers
- Create a File for each customer
- Add a map of the job
- Add photos of the job (house and soffit color)
- Add a worksheet that details the aspects of the job
MEASURING A HOME
There are many ways to measure a home.
- Bid off Contractor Plans in Drafting Software (RECOMMENDED)
- Measure the soffit tiles (RECOMMENDED)
- Measure with a tape measure or roller
- Google maps
- Measure with a laser (PROBLEMATIC)

BID OFF CONTRACTOR PLANS – DRAFTING SOFTWARE
There are many types of drafting software. We use one called PLANSWIFT. Within Planswift, we are able to do the following:
- Create save individual jobs
- Measure each roof line
- Measure each side separately (different color)
- Export Screen Shots to share with the customer
NOTE: It is really important to check the scale before measuring. There are times when customers are give a compressed version of the plans. These will not measure correctly. This happens maybe 10 to 20% of the time. Select the scale of the document, and measure a measurement on the plans. If it says something like 7′ and you measure 7′, your plans are to scale.
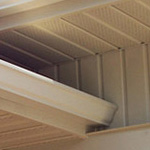
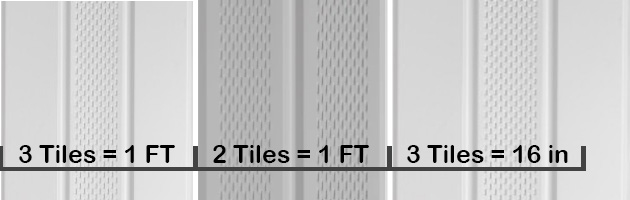
MEASURE THE SOFFIT TILES
Soffit tiles are an easy way to measure the home. They are typically in a fixed pattern on the home and all a consistent size. Most often soffit tiles come in:
- 3 tiles equal 1 foot
- 2 tiles equal 1 foot (Older Homes)
- 3 tiles equal 16″ (Older Homes)
- T&G (tongue and groove) wood soffits can be all sizes
It is always safest to take a tape measure and measure a few spans to ensure you are measuring correctly. Then it is as simple as counting the number of tiles and doing the math.
For example: If you count 60 tiles:
- 3 per foot = 20 feet (60/3=20)
- 2 per foot = 30 feet (60/2=30)
- 3 per 16″= 27 feet (60/3=20*1.333=26.66 Round to 27)
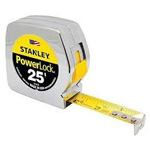
MEASURING WITH A TAPE or ROLLER
Other types of soffit are hardy board or sheet metal or even crown molding. Each are difficult to measure if you don’t know the length of the sheets. So, it is best to have a tape measure or roller on hand in the case you need to use them. Often times, these are found on more customer or high end homes.
- Role around the base of the house to get
- Determine the pitch of the roof or height of the center of each peak to determine the length of the slope on each peak.
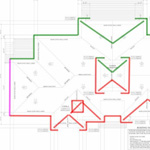
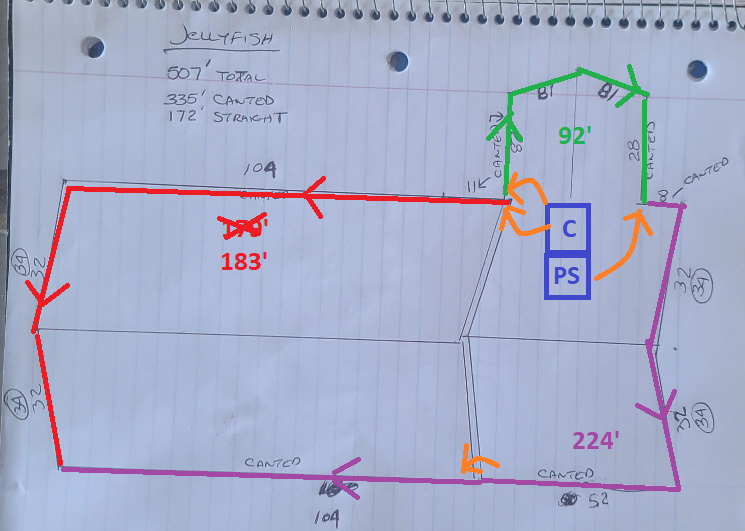
DRAW A MAP
Draw a map of the full roof line. Double check the map and measurements to make sure you don’t miss anything. Measure each side individually and round the number up. This will help you account for a little waste on the job.
The bidding and mapping process should be used to identify a few things:
- Accurately measure the house
- Identify the placement of the control box
- Talk to the homeowner about power (a plug) for the control box
- Identify how you get from the control box to each starting point
- What type of track is needed?
- What is the color track needed? (Soffit Color)
- Do you need blank track?
- Are there special conditions?
- Is there attic access?
- Can all the wires be hidden?
- Will you need a transmitter and receiver?
- Will they need a WiFi extender?
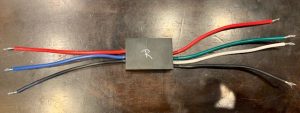
TRANSMITTERS AND RECEIVERS
When you look at the control box and starting points on a home, you will be able to determine if a transmitter a receiver or both. It all depends on the length between the control box and starting point, or between light to light. Visit TRANSMITTERS and RECEIVERS or JUMPS BETWEEN LIGHTS for more info.

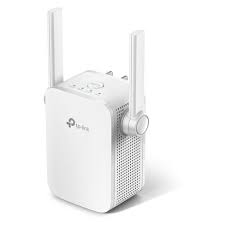
WIFI EXTENDER
A WiFi Extender, often called a Signal Extender is used to increase the range between the control box and the home router. There are numerous types of WiFi Extenders on the market. You can offer them or they can buy on themselves. A good rule, is that if there is more than 50 feet between the Router and Control Box, you ought to be informing the customer that one may be needed. Show up with one just in case. If the control box will not connect to the Router, this is the first thing to consider when troubleshooting. Visit: SET UP A WIFI EXTENDER for an example.